Eyes...
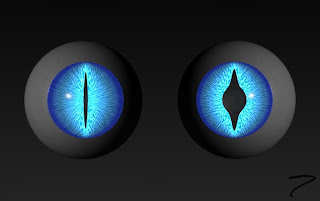
 ephy is coming along quite nicely. After I pretty much completed the head modeling it was time to pick out what sort of eyes he should have. There were a few criteria I had for coming up with an eye including: animate-able (pupil should be able to be dilated), one mesh (I want to be able to append just one mesh to many files), different pupil shapes (I originally wanted a cat like eye), and I wanted the iris to deform when the pupil dilated. This last one was more of a hope then a requirement. The current trend in CG arts is to use an eye modeled after the Pixar characters and these eyes look fabulous, but it wasn't really what I was looking for (there is a great tutorial here for creating those eyes if you are interested). The mesh for the eye is separated into multiple parts (cornea, iris, pupil, white) and the iris doesn't deform when the pupil dilates. The iris color/texture is based on an image and when the pupil dilates it just covers up some of the image. I was really hoping to create something where as the pupil dilates you could actually see the iris muscles moving. I also wanted to make different pupil shapes and originally wanted to create a cat-like eye. I tried a number of different ways with the Pixar eye, but couldn't come up with different pupil shapes that I was satisfied with.
After much searching around I found a technique by Jon McKay, that pretty much fit the bill! I saw this example and was blown away. The iris muscles moved, there were different pupil shapes, and it was all done with procedural textures (no external images required). He's written up a great article about it which can be seen here. He seemed to have wanted the same things I did! After some playing around and tweaks I created the cat eye seen above. In the movie that I linked to before the cat eye pupils were sort of rounded, which I didn't like too much, so I made mine much more pointy. It looked great when it was contracted, but the shape in between full contraction and dilation wasn't what I was looking for (the right hand side of the picture shows the pupil deformed when half contracted).
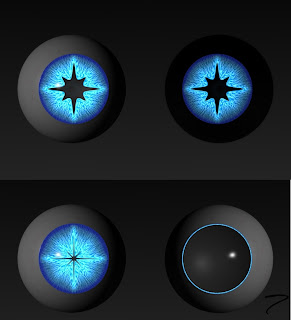 After some more playing around and tweaking I decided on the star pupil shape seen on the right. It gives a great alien like appearance, looks great when contracted, and also looks good halfway between contraction and dilation. I went ahead and made the iris emit some light, so they also glow in the dark (top right view in picture). I'll try to get a quick animation of the eye in action made up in the next few days. The next step in the modeling process is the hands. Hope you enjoy!
12:15 PM | Labels: Cephy, Modeling | 0 Comments
Modeling Cephy...
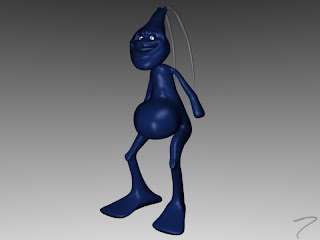
 ephy underwent a couple of changes this weekend, but the overall concept remains the same.
I really didn't have a head/face design in mind when I originally drew the character sheet for Cephy. I knew that I wanted a full face however, because that is something that I haven't really done before. Well, I have modeled a face, but never rigged or animated one. After doing some thinking and watching the general modeling video tutorial/time lapse on Creature Factory I tried my hand at doing something similar. I'm fairly happy with the face and head.
The problem is that the head didn't exactly fit my idea for the 6-8 dangling tentacles. I was a bit more attached to the general shape of the face and head, so I decided to change the whole "dread lock" look to just a couple of tentacles on the top of the skull. In a still image they almost look like horns, but this similarity should end when they start to swing around during an animation.

Like I said before, the face itself is based on a time-lapse modeling video that was on the Creature Factory DVD. Andy Goralczyk is the author/artist that arranged the DVD and he does fabulous work. I encourage you to check out some of his work here. Back to my face however, I think that I may need to add a couple of things when I go back and try to rig it, particularly around the eyes, but for now I think it came out pretty well. I'm thinking about adding some sort of sideways blinking action, similar to the creature in the trailers for the movie 10,000BC. I have a couple of ideas floating around in my head as to how to do this, so I'll have to find out if any are actually possible. The color and material is obviously still in process, but I hope you enjoy it for now! Oh, he also still needs hands as you can tell!
3:27 PM | Labels: Cephy, Modeling | 0 Comments
Update and Tentacle Tests...
 t's been a little while since I have updated, but between the holidays and getting back into the swing of things after the holidays everything has just now settled down a bit.
The Marty project started to bore me a little bit as I had already done the modeling, rigging, and walk cycle for him. I'm going to call him done for now until I can come up with something else that I want him to do. Maybe a short animation with both Bone and Marty?? We'll see...
I haven't been completely idle the past few weeks. I have been playing with some techniques in Tony Mullen's Bounce, Tumble, and Splash, which is an excellent book that goes over simulating real world events in Blender. There is a lot of discussion on physical events, such as bouncing balls, pouring water, jumping springs, etc. It's all really interesting and there is a surprising amount of work that goes into making computer generated images look and act like real life.
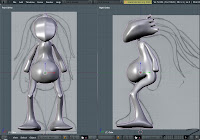 Playing with all the physics engines in Blender made me think about incorporating some of these things in with a character, so I set out trying to come up with something. What came out is based actually on a friend of mine's father (he doesn't actually look like this, but bear with me). I spent a great deal of time while I was younger at a friend's house who had a pool. Well, his father, who had a fairly large belly, would often join us. It was quite interesting because he wasn't the stereotypical picture of a swimmer, but it was really amazing the way he could dive in without making a splash and swim like a fish! What came out is a part man (with a belly!), part mermaid (with the flippers), and part squid (with the tentacles). The tentacles I thought would be interesting to animate and it may be fun to have him dive into some water. I call him Cephy, short for Cephalopod.
I've now modeled most of his body and am working on the tentacles on his head. The tentacles are tricky because there are a couple of different ways to create the tentacle in Blender. One way is simply to model all of them and apply a softbody to the mesh, but this would take quite a while as I'm thinking of having 6-8 tentacles. Another way to create a tentacle is to have a mesh object follow a curve object. This is done with an Array modifier and a Curve modifier put on the mesh. I played around with this one for a while, but I couldn't quite get the taper to a point to look good. The taper on the object is based on an offset and I just couldn't quite get it to look good. The final way that I tried was to give a curve a Bevel Object (shape) and a Taper Object. Both of these objects must be curves, which I had never really worked with before, but turns out to be pretty much the best way of doing this. Below is a video of the Curve tentacle and Object tentacle with a quick little animation to see how they react.
Finally, here is a quick video of something similar to the back of the head that I am imagining for Cephy.
Holiday Progress...
 fter a long holiday break, I have a large amount of updates! First things first, I re-made the rig for Marty the robot. The feet, hands, and hips were all changed, so it's quite different. These are some of my notes along with a snapshot of the complete rig.
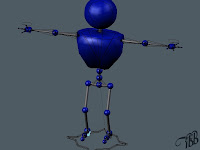
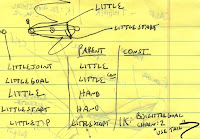
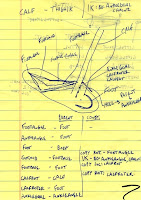
With a new rig it obviously meant that I had to make a new walk cycle. This was good animation practice for me, but I'm not as happy with it as the last one. I could have continued to tweak it, but I'm going to call it done for now. Enjoy!
Marty Walk Cycle from Tim Brown on Vimeo.
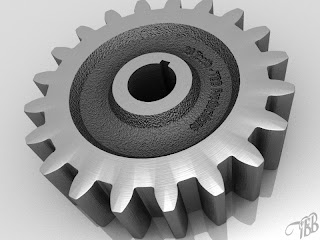
Next, I played around with a python script called Blender Mechanical Gears, which is pretty fun. The script creates a single tooth of a gear, which you then have to spindup around it's center point to create a full gear. This one was rendered in Yafray, with the texture created in Gimp. I think it came out really well!
2:40 PM | Labels: Doodles, Gimp, Marty, Rigging | 0 Comments